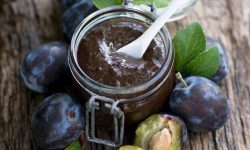
As summer comes to an end, we are stocking up on all the delicious summer…
Want to make jam? Follow along with our how-to video. If you’d like more detailed instructions, keep reading to the end of this post.
WHAT YOU’LL NEED
5 cups crushed strawberries (this will be about 8-9 cups whole fruit)
3-5 cups sugar
pectin (if you like a firm set) or juice of two lemons (if you don’t)
a large pot for cooking the jam
If you’re canning this jam, you also need:
A very big pot or a water bath canner
Either another medium sized pot, or a kettle to heat water
1 small pot or bowl to sanitize the lids
Pint canning jars
Lids
Rings
Jar grabber
Lid lifter
Jar funnel
Large spoons and ladles
Spatula
Clean tea towels
TO MAKE THE JAM
To prepare the strawberries: wash your berries, then remove the tops and hull them (save them and use them for infused water!).
Cook your berries in a large pot, mashing it as you go. Crush it to your preference—some people like bigger chunks of fruit in their jam, but it’s good to crush them a bit to release their natural pectin. Once you have fruit soup, you’re ready to proceed.
Measure your cooked fruit by weight. Measure out an equal amount of sugar.
Do you have to add that much sugar? Well, it depends. In addition to preserving the fruit, sugar also helps thicken your jam. Traditionally, you’d add equal parts sugar and fruit (by weight). However, most people find the resulting jam too sweet, especially when your fruit is sweet to begin with. A good guideline is to add 70-85% of the fruit’s weight in sugar to the jam, depending on the sweetness of the fruit.
You’ll want to check your pectin package before you decide, as each brand of pectin is slightly different. Some, like Pomona’s, are activated with calcium, allowing your jam to set with less sugar added. You can make jam with no sugar, but it’s not suited for canning (try freezer jam!).
Do you have to use pectin at all? Not necessarily, but it affects the set (the set refers to the thickness of the jam when it’s finished). Strawberries are relatively low in pectin, so left to their own devices, they will produce a fairly runny jam. Some people like this, but others insist that it isn’t jam unless you can bounce a spoon off it.
If you prefer a looser set, you can make your jam with lemon juice. If you’re somewhere in the middle, you can reduce some of the juice from the fruit to thicken it before you add in the rest of the fruit and cook it. If you’re a purist, you can always make your own pectin. If you like your jam solid, find your favourite pectin and follow package instructions.
Whatever you decide, take your fruit mixture, sugar, and pectin, and mix in a big pot. Put a small plate and a few spoons in the freezer (we’ll use this to check the set). Then turn up the heat to high. This is not the time to walk away and check your email. You want to watch this pot, stirring often, till the mixture comes to a full boil (the kind that can’t be scared away by stirring).
You’ll notice that your jam-in-progress is probably foaming. Traditionalists will insist that you skim the foam off, because it may result in a slightly less clear jam. Pragmatists will tell you that it’s still jam, and why bother with the skimming? It’s up to you, but whatever you do, don’t discard the foam! Save it in a small jar and eat it for breakfast.
Once you notice that your jam is starting to thicken, take a small amount and put it on your cold plate. Put the plate back in the freezer for a minute, and then push the jam gently with the spoon. If the top of the jam wrinkles, it’s ready. If not, give it another minute. If you’re nervous or brand new to jam making, turn off the heat while you’re doing this test. You can always cook your jam longer, but you can’t uncook it. If it’s still runny, cook for another minute and test again.
When you see that telltale wrinkle, your jam is ready! You can let it cool for a few minutes, then carefully ladle it into cleaned and sterilized jars, leaving half an inch of headspace.
TO FREEZE THE JAM
If this is freezer jam, let it cool and put it in the freezer.
TO CAN THE JAM
If you’re canning the jam, wipe the jar lids with a clean cloth, then place the lids on your jars using the lid lifter. Don’t touch the inside of the lids if you can help it. Screw on the rings as tightly as you can using your fingertips (not too tight!). Place your jars in the pot of boiling water and process for 10 minutes.
Once the time has elapsed, remove jars from the water bath, and place them on a tea towel on the counter. Make sure your jars don’t touch. If they’ve been canned correctly, the lids will seal as the jars cool. You may hear a popping sound when this happens.
When the jars are cool enough to touch, check the seal by ensuring that the jar lids are indented. If any jars haven’t sealed, refrigerate them and eat them within a few weeks.
Congratulations, you’ve made jam!
Related Posts